All measurements in millimetres, weights in grams. For the photographic representation, we use an item size both studio light. The illustrations, technical data, dimensions and designs are non-binding. We reserve the right to make changes at any time without notice. The useful dimensions are defined or shown reinforced or result from the article designation. Other dimensions are for illustrative purposes only. Please note this in case of misuse.
Description
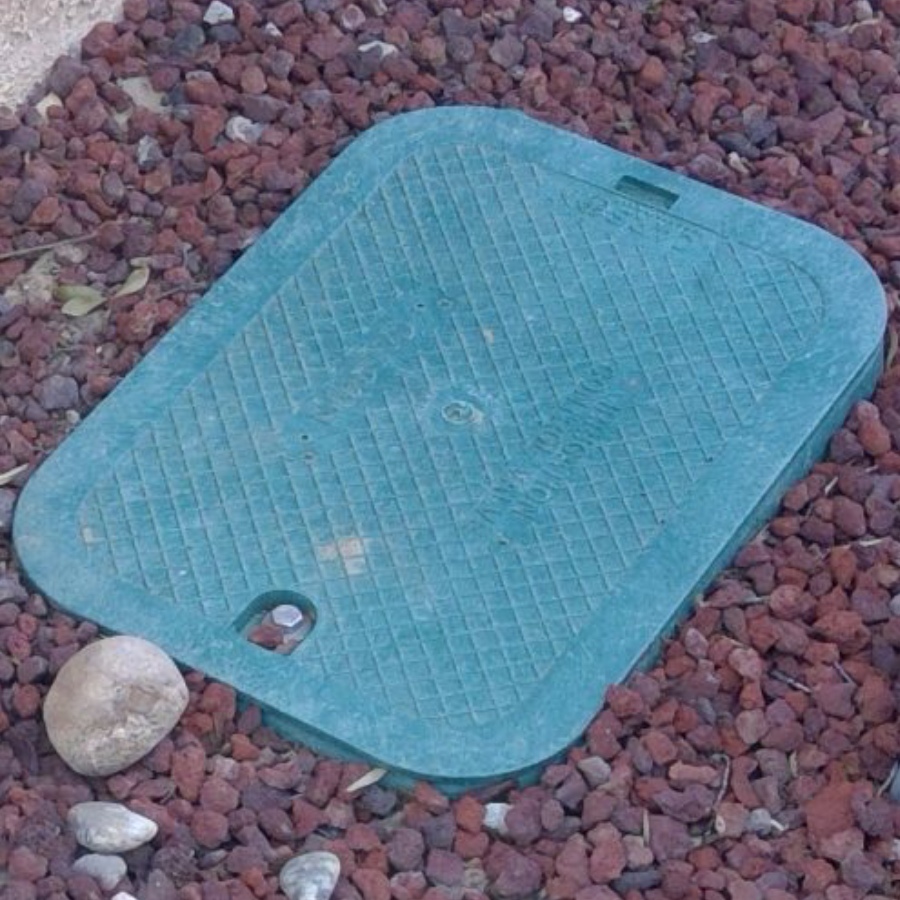
ALWASAIL HTC Valve Box
We met this manufacturer at a trade fair in Dubai and are impressed by the high-quality standards. ALWASAIL is the top supplier for golf courses and hotel complexes in the Middle East. The harsh conditions with extremely hot daytime temperatures under blazing sun and very cold nights ensure an extremely high-quality standard at attractive prices.
Quality and Features:
- High-impact resistant, fiber-reinforced plastic in the most stable design
- Pleasant tactile feel, reflecting the high-quality material and injection molding technique
- Reinforced lid for higher load capacity
- Reinforced ribs for high sidewall strength
- Overlapping cover prevents dirt and grass from getting stuck between the lid and the box
- Steep flanks to optimize space and make drilling or cutting easier
- UV inhibitors prevent discoloration and cracking
- Specially designed for professional and heavy-duty use – ALWASAIL valve boxes are the No. 1 in golf course construction
- Superior strength for commercial and utility applications
- Lid locking on Standard 12" and Jumbo 12" versions with screw and nut M8 x 80mm (a socket wrench is required for opening and closing), preventing vandalism and unauthorized opening
- Three sizes: 12" Standard, 12" Jumbo, and 15" Jumbo cover a broad range of uses
Well-planned is half the battle
Prepare a correspondingly large hole at the construction site for your valve box. Fill this hole with at least 1/3 gravel or similar and place your valve box in this gravel bed. The valve box for holding your distribution unit is open at the bottom – this is for good reason. For example, water entering during rain can easily drain away or seep into the gravel bed. It is also beneficial if the valve box is located in a general gravel area.
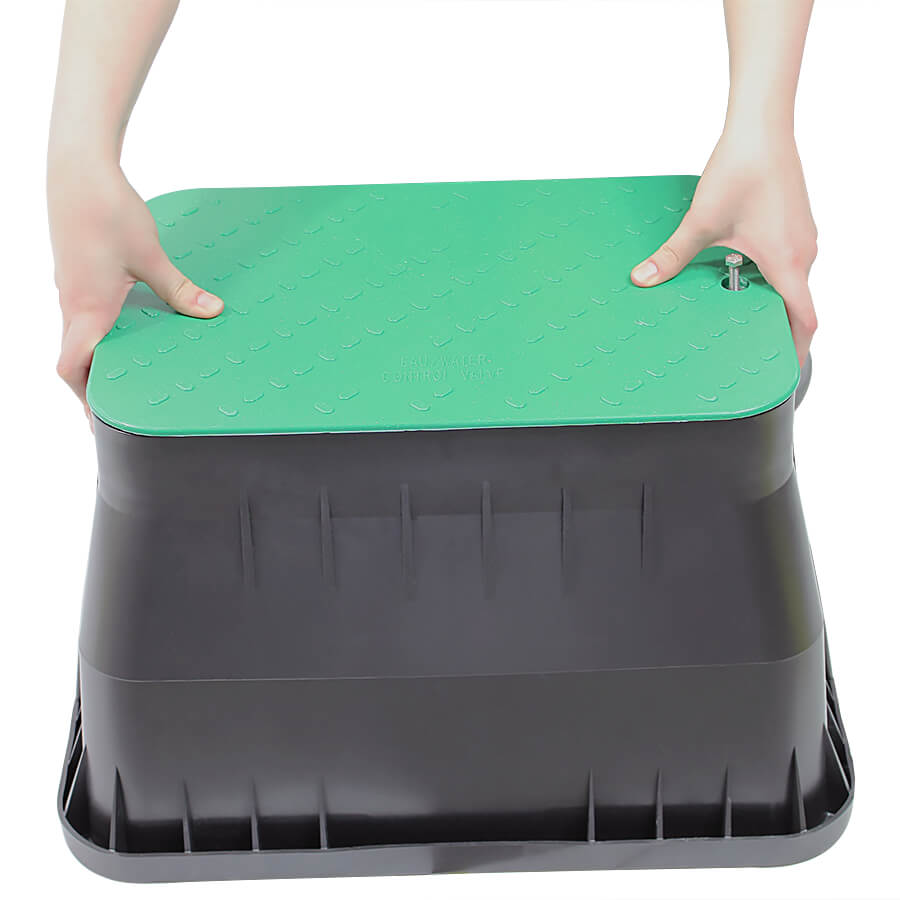
Properly place the valve box lid – explained simply
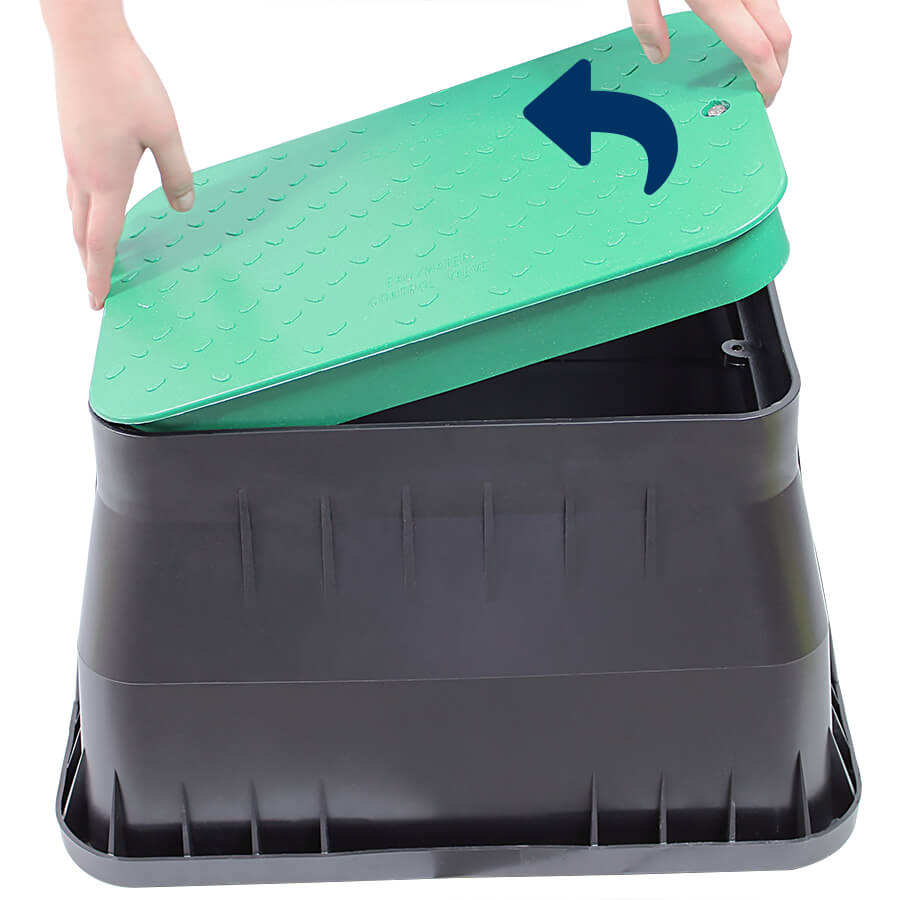
Step 1
Place the lid at an angle so that the side with the internal catch fits inside the valve box, and the side with the screw lock faces upwards.
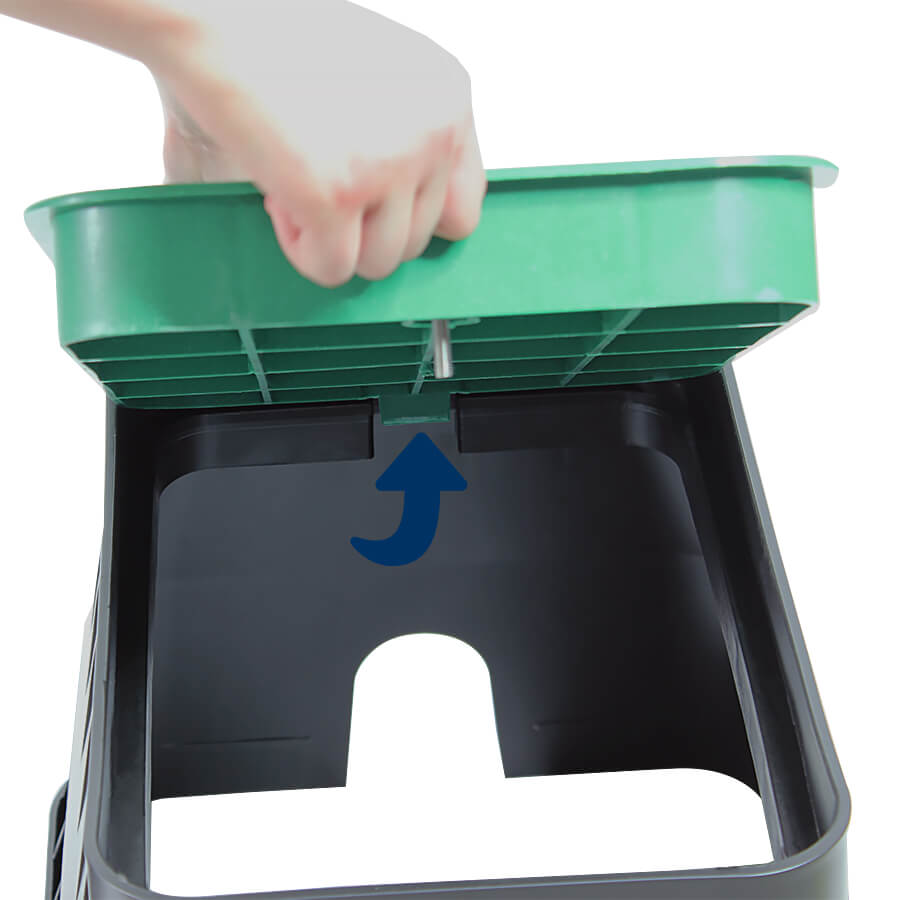
Step 2
The green catch lock of the lid already locks into the lid housing, preventing damage when fully locking the lid.
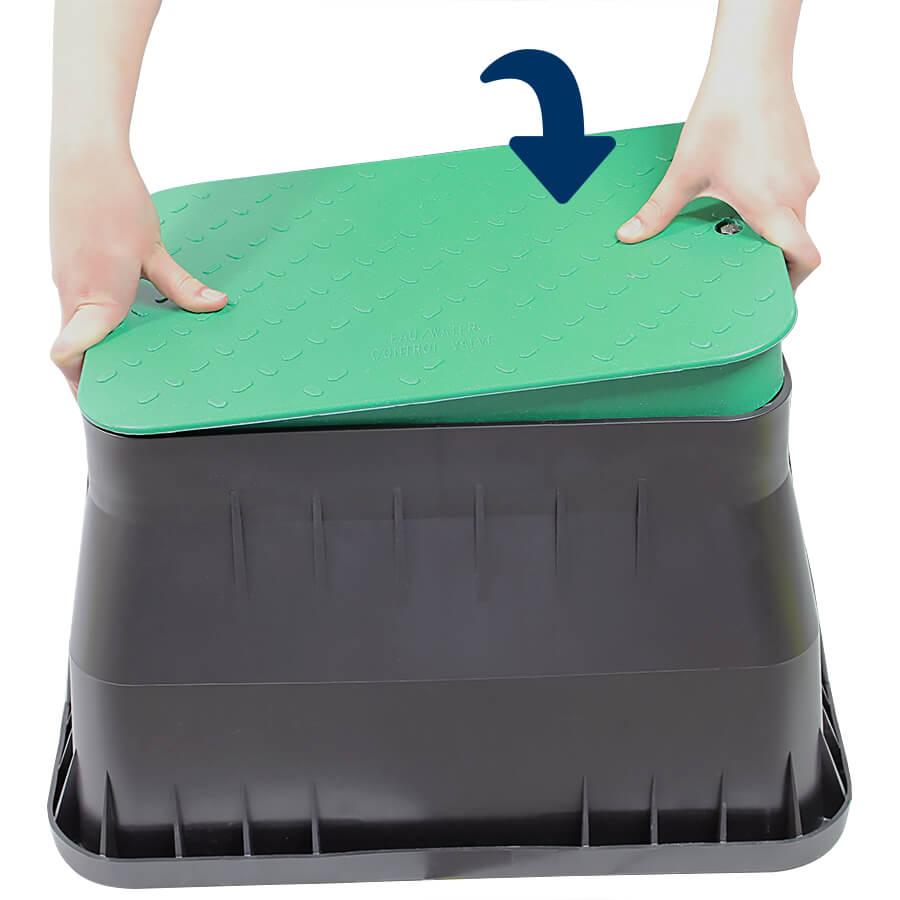
Step 3
Press the side with the screw lock into the recess of the valve box body, pulling the screw upwards if necessary.
Step 4
Done – Secure your fittings in the valve box by screwing in the securing screw to prevent vandalism. A socket wrench is required for this.
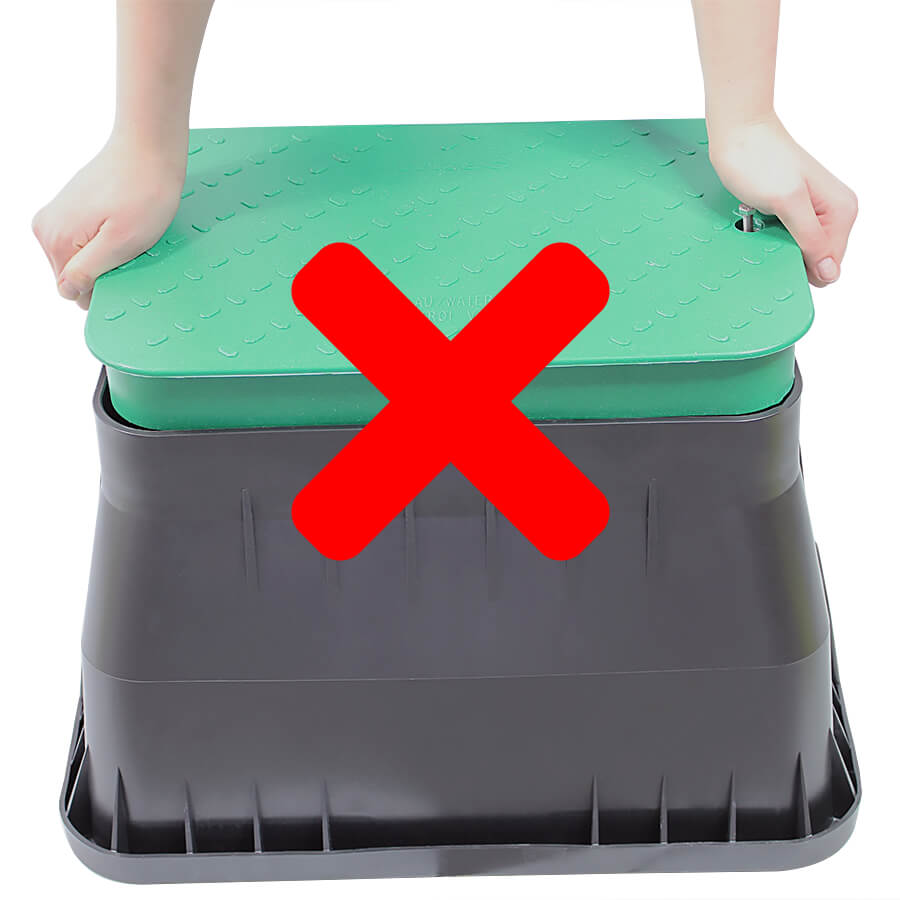
Do Not Do This!
Pressing the lid on both sides may cause the hold-down catch on the underside of the lid to break.
Media
There are currently no media files available.